Friday, October 29, 2010

Halloween


Driving home through the tree-lined neighborhoods, kids running down sidewalks in their Halloween costumes, heading for their schools.
I love the colors of fall, the musty smell of damp leaves in the air.
Can't wait for this weekend, dressing up, trick or treating with the girls, eating comfort food and kids ringing the doorbell in search of loot. 
Here is a Halloween collage from a few years back. 
Happy Halloween!

Wednesday, October 27, 2010

Speaking of Americana...

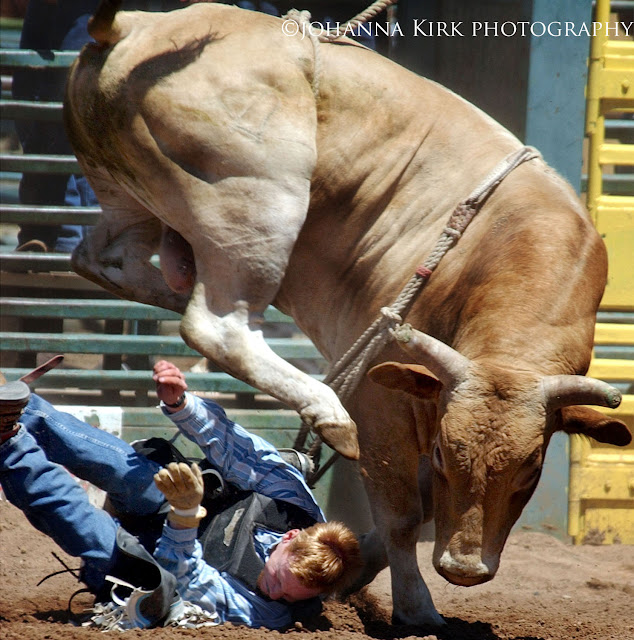
Does it get any more "wild west" than this?

Tuesday, October 26, 2010

Americana

I love all things "Americana". Stuff I grew up seeing in movies and never thought existed until I moved to the states are realized they're actually real. Like cheerleaders, small ma-and-pa joints with barstools and ladies pouring coffee calling you "honey", cowboys, trucks....it's all fantastically American and I try to photograph it when I see it. This is a small hamburger/milkshake "joint" in Moab where I took the kids for shakes and fries last weekend. 
Only wish I had a wider lens so I could have really captured "the whole" of this tiny little place.

Monday, October 25, 2010

Get closer


The legendary photojournalist Robert Capa once said : "If you're pictures aren't good enough, you're not close enough".
One of the most common mistakes of photographers is not getting close to their subject. To photograph at a "safe distance" often means you're too far away, not getting enough details, or your image has too much going on that distracts from the subject.
Sure, it's nice to get some establishing shots, but after that...move in, (or zoom in).
Portraits, for example, are really fascinating when we are closer than normal to the subject.  There's an intimacy of being close and you'll have to establish a rapport with your subject in order to get there. Photographing people you know makes this easier to practice. Stick to keeping it simple....and close.

Sunday, October 24, 2010

Pay it forward

I've been asked why I do this blog. After all...it takes time to think of things to write about and I don't get paid doing it. Well, there is something to be said about paying it forward. To have knowledge about something and to pass it on, to share it, openly and freely.
So many people hold on to their knowledge tightly and are afraid that sharing it will somehow lessen their value, their individuality, that something that gives them an edge.
Living in the age of where everything, it seems, is copyrighted, trademarked and protected, it's almost tabu to share something for free. I guess this is my way of rebelling. Because I believe, really believe, that sharing information, sharing ideas, not only helps you, but it helps me, helps all of us be more than we could have been alone.
In the vacuum of ourselves, it's difficult to grow, to see differently, to evolve. For me, creativity is a conversation, and who wants to converse alone?
With this blog, when I think of things I want to share, I get passionate, which in turn makes me want to photograph, and photography in the end, is all about communicating with someone, you, hoping my image will make you feel something. Similarly, my hope is that the words, my tips, my small tidbits of knowledge will inspire you, to see, to photograph, to communicate back. Share your images, your knowledge, with me or with others, invite knowledge by sharing it, pay it forward.

Wednesday, October 20, 2010

Quote of the day


“Always be a first-rate version of yourself, instead of a second-rate version of somebody else". -Judy Garland

Let's talk EXPOSURE- TUTORIAL

First of all, let me explain quickly how camera exposure works.
Engineers building cameras found that the majority of scenes we point our camera at have x amount of white and y amount of black that equals out to about 18 percent gray on average (this made more sense back before digital when everyone shot a lot of black and white).
Let's stay away from the exceptions to this and talk about the majority of scenes....the 18 percent gray ones. Your kid on a swing, in normal lighting, no crazy back light, no huge white or black objects in the frame. In this regular situation, chances are, your camera's metering of the scene is pretty accurate.

So let's start there. You're in manual mode, you're looking through your camera's viewfinder and with it's little lines at the bottom...it will tell you whether you're in the middle (that's the neutral 18 percent gray)...which is the camera's recommendation to you. Or you can go minus or plus of that.
Minus meaning less light=darker image
plus meaning more light=lighter image.
So you move either your shutter speed or aperture until that line is neutral in the middle of the line. That's your camera's recommended exposure.

The thing about exposure though, is that there are many variables you can choose to get to that same correctly exposed frame.
I like to think of exposure like filling a bathtub with water. You can fill it fast though a huge, wide open faucet. You can fill it slow, with a smaller stream coming out of your faucet. In the end, you have the same full tub of water.

So we're outside, it's bright sunlight, the camera's recommended exposure is f16 at 1/125th of a second. These numbers are tied to one another, so if you move one up, the other moves down.
f16 at 1/125th 
f11 at 1/250th 
f8 at 1/500th
f5.6 at 1/1000th 
The above exposures all let in EQUAL amount of light to expose your frame. As you either open or close the aperture, you have to "correct" by adjusting the shutter speed to half or double.
Exactly the same, filling that tub with water to the same height. Difference is how fast the water is flowing in and how big the faucets are, but the tub in the end is equally full.
The amount of light is the same in all these, but how you choose to let that light in, will determine how that frame looks in the end.

Small aperture (small "faucet") means you narrow the opening that let's in the light, thus you have to keep it open longer to fill your frame with light. Small apertures will have larger depth of field.
This means that more things in your photo will be in focus and not blurry.  This is really great for things like landscapes, when you want the flowers in the foreground to be in focus, as well as the mountains far in the distance. So in this instance...choose something like f16 at 1/125th of a second and you will get that.
Weird thing is that small aperture, actually have the larger numbers. So small apertures are f11, f16, f22 and so on.
Large apertures are the small numbers  f2.8, f4, f5.6 (just to be confusing, I know). 
These let in a lot of light quickly and the result is a narrow depth of field, with only a few select things in focus and the rest of the frame, blurry.

This works really well for sports or portraits, where the main subject is in focus but you don't want the eye wandering around the frame to other things, so you want backgrounds blurry. So if I'm photographing a portrait of my child, I may choose f5.6 at 1/1000th (or f4 at 1/2000th for even more blurry background).

I would recommend taking your camera out of program modes (sports, portraits, landscape, etc), because it's basically doing these calculations for you. Convenient? Yes! Helpful? No!
In order to fully understand exposure and have control over exactly how you want your images to look, you have to start shooting in manual mode more often and experiment with exposure.

Tuesday, October 19, 2010

Quote of the day

"...And that desire--the strong desire to take pictures--is important.
It borders on a need, based on a habit: the habit of seeing.
Whether working or not, photographers are looking, seeing, and thinking about what they see, a habit that is both a pleasure and a problem, for we seldom capture in a single photograph the full expression of what we see and feel.
It is the hope that we might express ourselves fully--and the evidence that other photographers have done so--that keep us taking pictures." -Sam Abell

Monday, October 18, 2010

Merge photos into a panorama


With many of the newer compact digital cameras, you can now merge several photos into a panorama in camera. If your camera doesn't do this, there is a fairly easy way to do this in photoshop. Photograph a series of photographs....in a panorama-like motion. As you pull each photo up as a layer in photoshop, select layers, align the layers and then merge into a panorama. Blend the layers and voila....PANORAMA!

Thursday, October 14, 2010

Bear Lake Farm


Last weekend, we attended a wedding at Bear Lake, Utah.Chris' cousin was getting married and we were fortunate enough to spend time on their family farm up there. Here's Emma with one of their horses.

Quote of the day

What the human eye observes causally and incuriously, the eye of the camera notes with relentless fidelity.
-Berenice Abbott

Wednesday, October 13, 2010

Slow shutterspeed to show motion-Tutorial

To follow up on my previous post on photographing sports and freezing action, an opposite but equallyinteresting technique is to use shutter speed to show motion. 
To freeze something moving quickly requires a fast shutter speed.
To "unfreeze" it, and to show it's motion, requires a slow shutter speed.
Granted, a slow shutter speed 1/60, 1/30, 1/15, 1/8, 1/4th of a second a so on, will blur motion in your photograph. 
Realize that if you slow your shutter speed down, handholding your camera can be difficult. Usually, most have difficulty handholding a camera any slower than 1/60th of a second and getting the subjects you want in focus. There will start being a blur simply from your hands shaking the camera slightly. You can get better at having a steady hand, but use that as a general guide. Anything really slow, use a tripod.
For example, if you want to photograph water running and want to get the water to that "whispy", "creamy" look....set your camera on a tripod and shoot the photo at a slow shutter speed.
This is where you need to experiment. Start at 1/30 and move your way slower to see the effects. 
One of the reasons digital is great is the ability to immediately see the results of what you're playing with. 

If you want to show motion in your photograph but to hand hold it, you can also try "panning". 
This is where you follow the moving subject (and try to focus as you do this) but do so at a slow shutter speed.
The result is the subject in focus but the background blurring with motion from your panning motion.


Tuesday, October 12, 2010

Flower


Playing around with textures.
Here are some flowers on my table. 
Is the "texture" distracting from the photo? What do you think?

In the neighborhood...

Returning from dropping the kids off at school, I came across this car crash on my block. Glad to say the people in the car were ok, but man....SLOW DOWN. When are we going to get some stop signs in this neighborhood? 

Monday, October 11, 2010

Quote of the day

"Try to go out empty and let your images fill you up."
-Jay Maisel

Moooost post this

A gorgeous bull moose wandering around at Bear Lake, Utah, this weekend. Thought I'd share:).

Friday, October 8, 2010

Photographing Sports Tutorial


People ask me all the time how to photograph sports. Granted, most will not be photographing Olympic skiing or NBA games, but still, it's important to understand how to freeze action and photograph things that move...and move quickly.
First step is to understand how your camera works.
Without getting too technical, basically your camera lets light in through it's aperture, and the f-stops on your camera determines how large or small the aperture (hole that lets in light) is.
The shutter speed is what determines how fast that shutter opens and closes, (to let in light) and thus is instrumental in photographing sports.
On your camera there will be settings for your shutter speed. 1/60, 1/125, 1/250, 1/500, 1/1000th and so on.
As a general rule, in order to freeze action you need to photograph at a minimum of 1/500. This means your aperture will open and close at 1/500th of a second. For most moving subjects this will be adequate. Granted, if you're photographing something like car racing, you will have to double or triple that speed to 1/1000, or 1/2000, etc
You will notice that when you set your camera at such high speeds, in order to let get enough light to correctly expose your photo, you will need to open your aperture (fstop) to f5.6, f4, or f2.8. This will mean that your depth of field (the area that is in focus) will narrow. So you have to be extra careful to keep your subjects in focus since only a very small area is in that range at a wide open aperture.
Once you get better at this, you'll realize that a narrow depth of field is the look you often want since only the subject will be in focus and everything else....blurry. Perfect for sports.
This is also why many who photograph sports buy very expensive lenses. Because the wider your aperture (f2.8 for example), you are able to photograph sports in darker situations. If you're looking for a minimum of 1/500th of a second, you'll notice that you need a lot of light or a very open aperture, and if your lens only opens to an f5.6, you'll run out of light and be forced to slow your shutterspeed not to underexpose your images and thus...things will begin to get blurry. Frustrating, I know! And one of the many reasons photographers LOVE lenses with  f2.8 and pay dearly for them. On top of that, when photographing sports you'll also need longer glass. Something that gets you close to your subject since you most likely can't be closer than the sidelines of a game. A minimum of a 200 mm lens, but more often than not, a 300mm or 400 mm is the standard. For some sports, even bigger glass is required.


Thursday, October 7, 2010

Photo contest!

Want to win money? Fame? Glory?
Test your photo chops?
Have some great photos laying around that you think are awesome?
Check out this contest!
IPA Home

Tuesday, October 5, 2010

Grace

Speaking of photographing what you know. 
Shot this of Grace this afternoon.
Window light...easy, free...perfect!:)

Photograph what you know


Many of us have ambitions to photograph great pictures. 
And often as we wait for that "perfect" moment to photograph, we put the camera on the shelf
and forget all the photography-worthy things around us everyday. 
Photograph what you know.
By photographing your everyday life, you can practice your skills and if nothing else,
be prepared technically and creatively when that perfect project presents itself.
We see what others photograph and it's natural to want incorporate what we admire, to get better, evolve. But don't be a carbon copy. Just because you can't go out with the perfect model, at the perfect moment, with three assistants and more lighting props than you could ever dream of doesn't mean you have to put your camera down. Rather than focusing on the things that aren't available for you to photograph, narrow in on the stuff that IS available to you. Apply new techniques to your photos, your life, the subjects, objects, places that are unique to your life and your style.
The flowers on your table, your favorite team's game, people you know, your kids...sleeping:). 


Sunday, October 3, 2010

Background check

One of the most common mistakes in portraits is not checking your background.
I know, when photographing people, there are so many things going on, often we get so occupied with the person(s) we're trying to photograph, we forget to check the background.
Once you are about to press that shutter, take a second to check the background. Is there a tree sticking out of the head of one of the people in the photo? A fence "decapitating" the subject? Something distracting in the background that takes away from your portrait? If so, rearrange. Go lower, higher, to the side.
Avoid tunnel vision. It's a rookie mistake, easy to do... but even easier to correct. You get so excited about everyone looking good that you don't see until you pull the pics up on your computer that there's a giant branch that seems to be poking your subject in the head. Not the effect you were hoping for.
So take a moment and make sure that the area around the subjects head is clean, you'll be happy you did.

Friday, October 1, 2010

Wifey?

This just made me smile:)

Photo tip of the day: "Framing"- the illusion of depth

One of the downsides to a photograph is that it is two dimensional.
"Framing" is a technique used in order to add dimension to your photo and create the illusion of depth to your image.
By placing something in front of your subject, it visually translates to the viewer that there are several layers to the image, that something is close and something else is farther away; giving the image depth and a sense of three dimensionality.
Frames can be anything from a window, a bridge, a tunnel, trees, a door...something that draws the eye to the subject and "frames" it visually to communicate depth in the image.