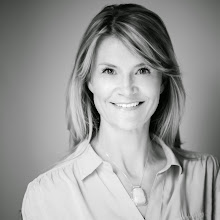
Congratulations on your upcoming graduation Addi!
Showing posts with label portrait. Show all posts
Tuesday, May 7, 2013
Senior portraits
This week I photographed beautiful Addi who is graduating this spring. I've known Addi for about 8 years as I'm close friends with her mother and it's been a joy to watch Addi grow into the great young woman she is today. We had such a fun day together photographing despite rainclouds, wind and unexpected cold weather with her mother acting as my "assistant" and being a pro with those reflectors (even the one that broke in the wind;).
Congratulations on your upcoming graduation Addi!
photos, photography, gear, moment
girl,
graduation,
high school,
high school senior photos,
portrait,
portrait photography,
salt lake city,
senior portraits,
seniors,
teen,
utah,
woman
Friday, December 2, 2011
Yoga on my mind...
My dear friend Heidi is a yoga instructor...she's MY yoga instructor. A few years ago she built a beautiful studio in her home where she teaches the most awesome classes. I'm probably one of the least flexible people in the world (no, I'm not kidding) and when you're tight like a 70-year-old guy, yoga can be a bit intimidating. To spend an hour and a half doing the very thing that I'm worst at...flexing and stretching has taken a lot of accepting, breathing and just...being ok with where I am at.
Heidi has helped me do that. Her calm voice, her gentle poses and simple suggestions have nudged me toward that acceptance and I now revel in the time I can spend in her class.
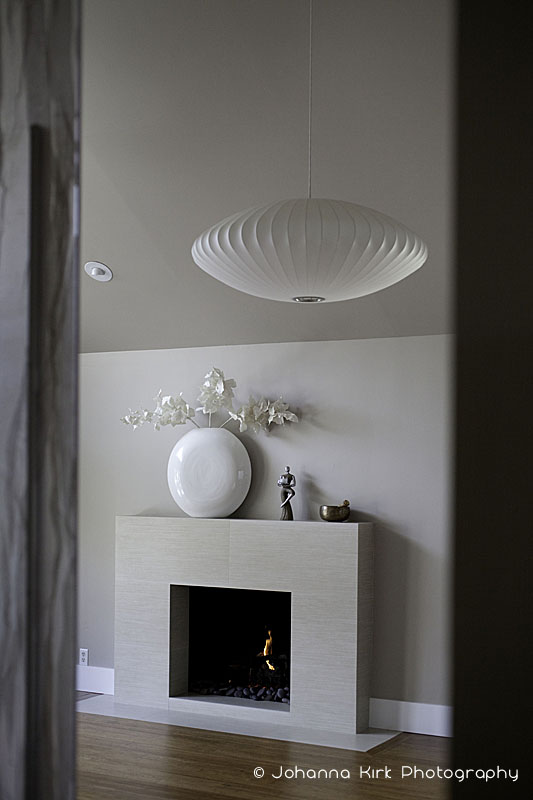
A while back she asked me to take a few pictures of her studio, and after class two weeks ago we were able to do just that. We still have plans for some more stuff showing classes and poses but I just wanted to share the first batch. I love how the two portraits show different sides of Heidi. Happy, sweet, gentle, strong, thoughtful and beautiful. She is all of those and more. For more info on her classes and workshops, check out (and like) her Facebook page and look for her new website to come.
Heidi has helped me do that. Her calm voice, her gentle poses and simple suggestions have nudged me toward that acceptance and I now revel in the time I can spend in her class.
A while back she asked me to take a few pictures of her studio, and after class two weeks ago we were able to do just that. We still have plans for some more stuff showing classes and poses but I just wanted to share the first batch. I love how the two portraits show different sides of Heidi. Happy, sweet, gentle, strong, thoughtful and beautiful. She is all of those and more. For more info on her classes and workshops, check out (and like) her Facebook page and look for her new website to come.
![]() |
| Add caption |
photos, photography, gear, moment
architecture,
beauty,
interior,
portrait,
salt lake city photographer,
studio,
utah,
yoga
Tuesday, November 15, 2011
Autumn Portraits
The fall colors in Salt Lake City are just about over. Snow is on it's way and you can smell winter in the air. I was lucky enough to photograph Brad and Amy and their awesome dog Bandit a few weeks back in a local park at the height of color. Love the rich colors and Amy's red hair only adds to all that awesome color.
They are getting married in New Orleans in December and wanted some photos of them hanging out with their sweet pup. An awesome session with a sweet couple up for anything and I was covered in dog kisses trying to shoot the pic of Bandit in the foreground and them out of focus in the back. Finally got it, but Bandit made sure lick my face thoroughly a few times first:).
Photographing pets with their owners can be a challenge but I really love it. It's a little more time consuming and you certainly get lots of photos with just a ball of blur passing through the frame, but being a dog lover surely helps. Look forward to photographing more doggies and their owners in the future. Bring on the slobber!
They are getting married in New Orleans in December and wanted some photos of them hanging out with their sweet pup. An awesome session with a sweet couple up for anything and I was covered in dog kisses trying to shoot the pic of Bandit in the foreground and them out of focus in the back. Finally got it, but Bandit made sure lick my face thoroughly a few times first:).
Photographing pets with their owners can be a challenge but I really love it. It's a little more time consuming and you certainly get lots of photos with just a ball of blur passing through the frame, but being a dog lover surely helps. Look forward to photographing more doggies and their owners in the future. Bring on the slobber!
photos, photography, gear, moment
colors,
couple,
dog,
engagement,
pet,
portrait,
salt lake dog photographepet photographer,
salt lake photographer,
salt lake portrait photographer
Wednesday, February 2, 2011
Seniors
Spend Saturday photographing a bunch of awesome High School students.
Talanted photographer Mary Denton Taylor, http://tayloredviewphotography.blogspot.com/
arranged for a group of photographers and seniors to get together and play with various setups, lighting, poses, etc. Thank you Mary for all your work and thank you to all the seniors who were so patient in the freezing cold.
Here are a few of the pics from the day.
photos, photography, gear, moment
high school,
models,
photo,
photography,
portrait,
salt lake city,
seniors,
students,
teenager,
teens,
urban,
utah
Wednesday, October 20, 2010
Let's talk EXPOSURE- TUTORIAL
First of all, let me explain quickly how camera exposure works.
Engineers building cameras found that the majority of scenes we point our camera at have x amount of white and y amount of black that equals out to about 18 percent gray on average (this made more sense back before digital when everyone shot a lot of black and white).
Let's stay away from the exceptions to this and talk about the majority of scenes....the 18 percent gray ones. Your kid on a swing, in normal lighting, no crazy back light, no huge white or black objects in the frame. In this regular situation, chances are, your camera's metering of the scene is pretty accurate.
So let's start there. You're in manual mode, you're looking through your camera's viewfinder and with it's little lines at the bottom...it will tell you whether you're in the middle (that's the neutral 18 percent gray)...which is the camera's recommendation to you. Or you can go minus or plus of that.
Minus meaning less light=darker image
plus meaning more light=lighter image.
So you move either your shutter speed or aperture until that line is neutral in the middle of the line. That's your camera's recommended exposure.
The thing about exposure though, is that there are many variables you can choose to get to that same correctly exposed frame.
I like to think of exposure like filling a bathtub with water. You can fill it fast though a huge, wide open faucet. You can fill it slow, with a smaller stream coming out of your faucet. In the end, you have the same full tub of water.
So we're outside, it's bright sunlight, the camera's recommended exposure is f16 at 1/125th of a second. These numbers are tied to one another, so if you move one up, the other moves down.
f16 at 1/125th
f11 at 1/250th
f8 at 1/500th
f5.6 at 1/1000th
The above exposures all let in EQUAL amount of light to expose your frame. As you either open or close the aperture, you have to "correct" by adjusting the shutter speed to half or double.
Exactly the same, filling that tub with water to the same height. Difference is how fast the water is flowing in and how big the faucets are, but the tub in the end is equally full.
The amount of light is the same in all these, but how you choose to let that light in, will determine how that frame looks in the end.
Small aperture (small "faucet") means you narrow the opening that let's in the light, thus you have to keep it open longer to fill your frame with light. Small apertures will have larger depth of field.
This means that more things in your photo will be in focus and not blurry. This is really great for things like landscapes, when you want the flowers in the foreground to be in focus, as well as the mountains far in the distance. So in this instance...choose something like f16 at 1/125th of a second and you will get that.
Weird thing is that small aperture, actually have the larger numbers. So small apertures are f11, f16, f22 and so on.
Large apertures are the small numbers f2.8, f4, f5.6 (just to be confusing, I know).
These let in a lot of light quickly and the result is a narrow depth of field, with only a few select things in focus and the rest of the frame, blurry.
This works really well for sports or portraits, where the main subject is in focus but you don't want the eye wandering around the frame to other things, so you want backgrounds blurry. So if I'm photographing a portrait of my child, I may choose f5.6 at 1/1000th (or f4 at 1/2000th for even more blurry background).
I would recommend taking your camera out of program modes (sports, portraits, landscape, etc), because it's basically doing these calculations for you. Convenient? Yes! Helpful? No!
In order to fully understand exposure and have control over exactly how you want your images to look, you have to start shooting in manual mode more often and experiment with exposure.
Engineers building cameras found that the majority of scenes we point our camera at have x amount of white and y amount of black that equals out to about 18 percent gray on average (this made more sense back before digital when everyone shot a lot of black and white).
Let's stay away from the exceptions to this and talk about the majority of scenes....the 18 percent gray ones. Your kid on a swing, in normal lighting, no crazy back light, no huge white or black objects in the frame. In this regular situation, chances are, your camera's metering of the scene is pretty accurate.
So let's start there. You're in manual mode, you're looking through your camera's viewfinder and with it's little lines at the bottom...it will tell you whether you're in the middle (that's the neutral 18 percent gray)...which is the camera's recommendation to you. Or you can go minus or plus of that.
Minus meaning less light=darker image
plus meaning more light=lighter image.
So you move either your shutter speed or aperture until that line is neutral in the middle of the line. That's your camera's recommended exposure.
The thing about exposure though, is that there are many variables you can choose to get to that same correctly exposed frame.
I like to think of exposure like filling a bathtub with water. You can fill it fast though a huge, wide open faucet. You can fill it slow, with a smaller stream coming out of your faucet. In the end, you have the same full tub of water.
So we're outside, it's bright sunlight, the camera's recommended exposure is f16 at 1/125th of a second. These numbers are tied to one another, so if you move one up, the other moves down.
f16 at 1/125th
f11 at 1/250th
f8 at 1/500th
f5.6 at 1/1000th
The above exposures all let in EQUAL amount of light to expose your frame. As you either open or close the aperture, you have to "correct" by adjusting the shutter speed to half or double.
Exactly the same, filling that tub with water to the same height. Difference is how fast the water is flowing in and how big the faucets are, but the tub in the end is equally full.
The amount of light is the same in all these, but how you choose to let that light in, will determine how that frame looks in the end.
Small aperture (small "faucet") means you narrow the opening that let's in the light, thus you have to keep it open longer to fill your frame with light. Small apertures will have larger depth of field.
This means that more things in your photo will be in focus and not blurry. This is really great for things like landscapes, when you want the flowers in the foreground to be in focus, as well as the mountains far in the distance. So in this instance...choose something like f16 at 1/125th of a second and you will get that.
Weird thing is that small aperture, actually have the larger numbers. So small apertures are f11, f16, f22 and so on.
Large apertures are the small numbers f2.8, f4, f5.6 (just to be confusing, I know).
These let in a lot of light quickly and the result is a narrow depth of field, with only a few select things in focus and the rest of the frame, blurry.
This works really well for sports or portraits, where the main subject is in focus but you don't want the eye wandering around the frame to other things, so you want backgrounds blurry. So if I'm photographing a portrait of my child, I may choose f5.6 at 1/1000th (or f4 at 1/2000th for even more blurry background).
I would recommend taking your camera out of program modes (sports, portraits, landscape, etc), because it's basically doing these calculations for you. Convenient? Yes! Helpful? No!
In order to fully understand exposure and have control over exactly how you want your images to look, you have to start shooting in manual mode more often and experiment with exposure.
photos, photography, gear, moment
18 percent gray,
aperture,
blurry,
depth of field,
Exposure,
focus,
fstop,
landscape,
portrait,
shutter speed
Tuesday, October 5, 2010
Grace
Speaking of photographing what you know.
Shot this of Grace this afternoon.
Window light...easy, free...perfect!:)
Subscribe to:
Posts (Atom)